tinkerforge relais raspberry pi 2
10 dec 2014
![]()
motivation
i’ve upgraded my illuminator installation, see previous post: http://blog.lastlog.de/posts/tinkerforge_relais_rapspberry_pi/index.html. in short that is:
- added another ‘master brick’
- upgraded from 3 to 4 ‘dual relay bricklet’
- added IO-16 bricklet
- added distance IR bricklet
- added Ralink RT2571W
- added 8 hardware buttons
- adapted the relais.js software
the main reason for this upgrade was that the used ‘multi touch bricklet’ was very very sensitive to toggling the state by touching not only the control field, which would have been what one excpets, but even by touching the cables connecting the bricklet with the multi touch field. this often resulted in unwanted toggling of devices - and since these are 230V i didn’t want that to happen at all.
WARNING - DISCLAIMER:
i’m no expert in electrical engineering - so if you copy this work, ask an expert to check on your setup before making daily use. especially check these things: ***
- i’m no tinkerforge expert, check your facts!
- do not work with 230V unless you really know what you are doing, it can kill
- ensure that the electrical load you are working with does not exceed given relais parameters
- add a filter so that a single relais isn’t toggled more than 10/min and disable the control on bursts
- consider adding a https://en.wikipedia.org/wiki/Residual-current_device
- this device is running in my LAN, do not expose it to the internet without further security additions
- consider running the node application as a normal user and not as root as i do
in fact, i’ve chosen tinkerforge dual relais bricklets over a self-built relais to avoid making critical errors which could result in your house burned to the ground or lives put to danger.
I’M NOT RESPONSIBLE IF YOUR DEVICE KILLS YOUR CAT OR BURNS DOWN YOUR HOUSE - YOU HAVE TO KNOW WHAT YOU ARE DOING!hardware setup
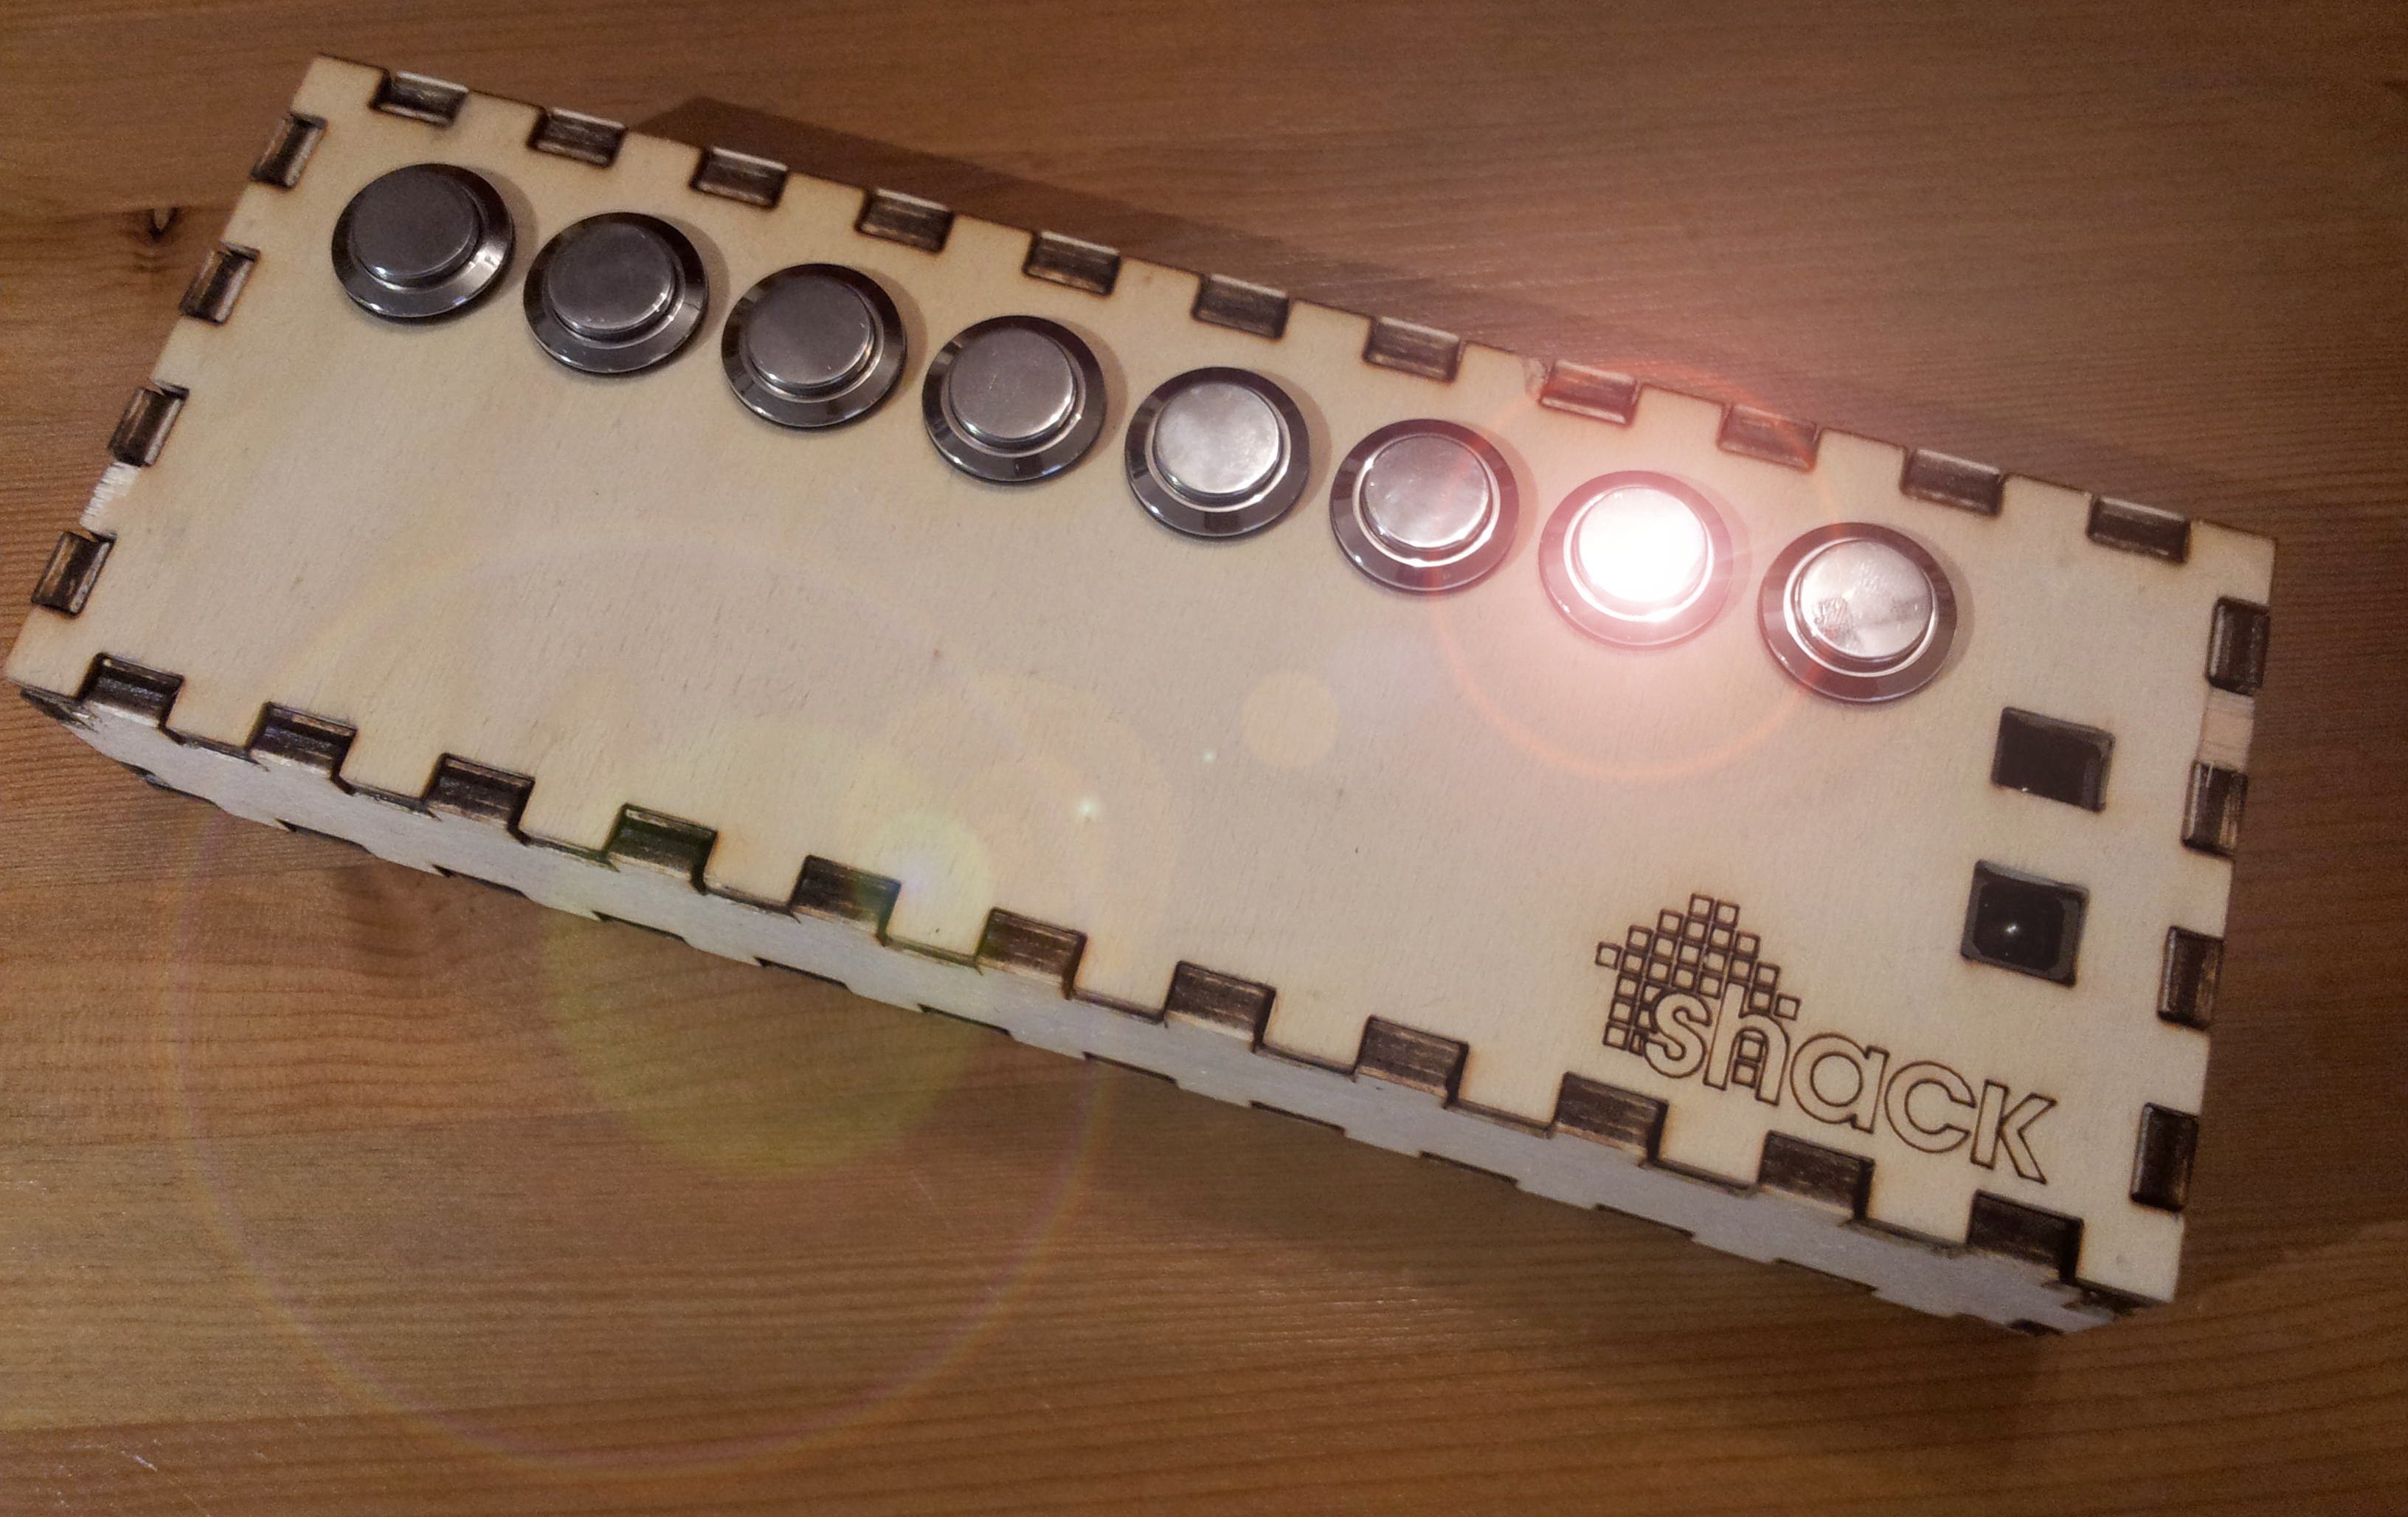
new interface with 8 buttons
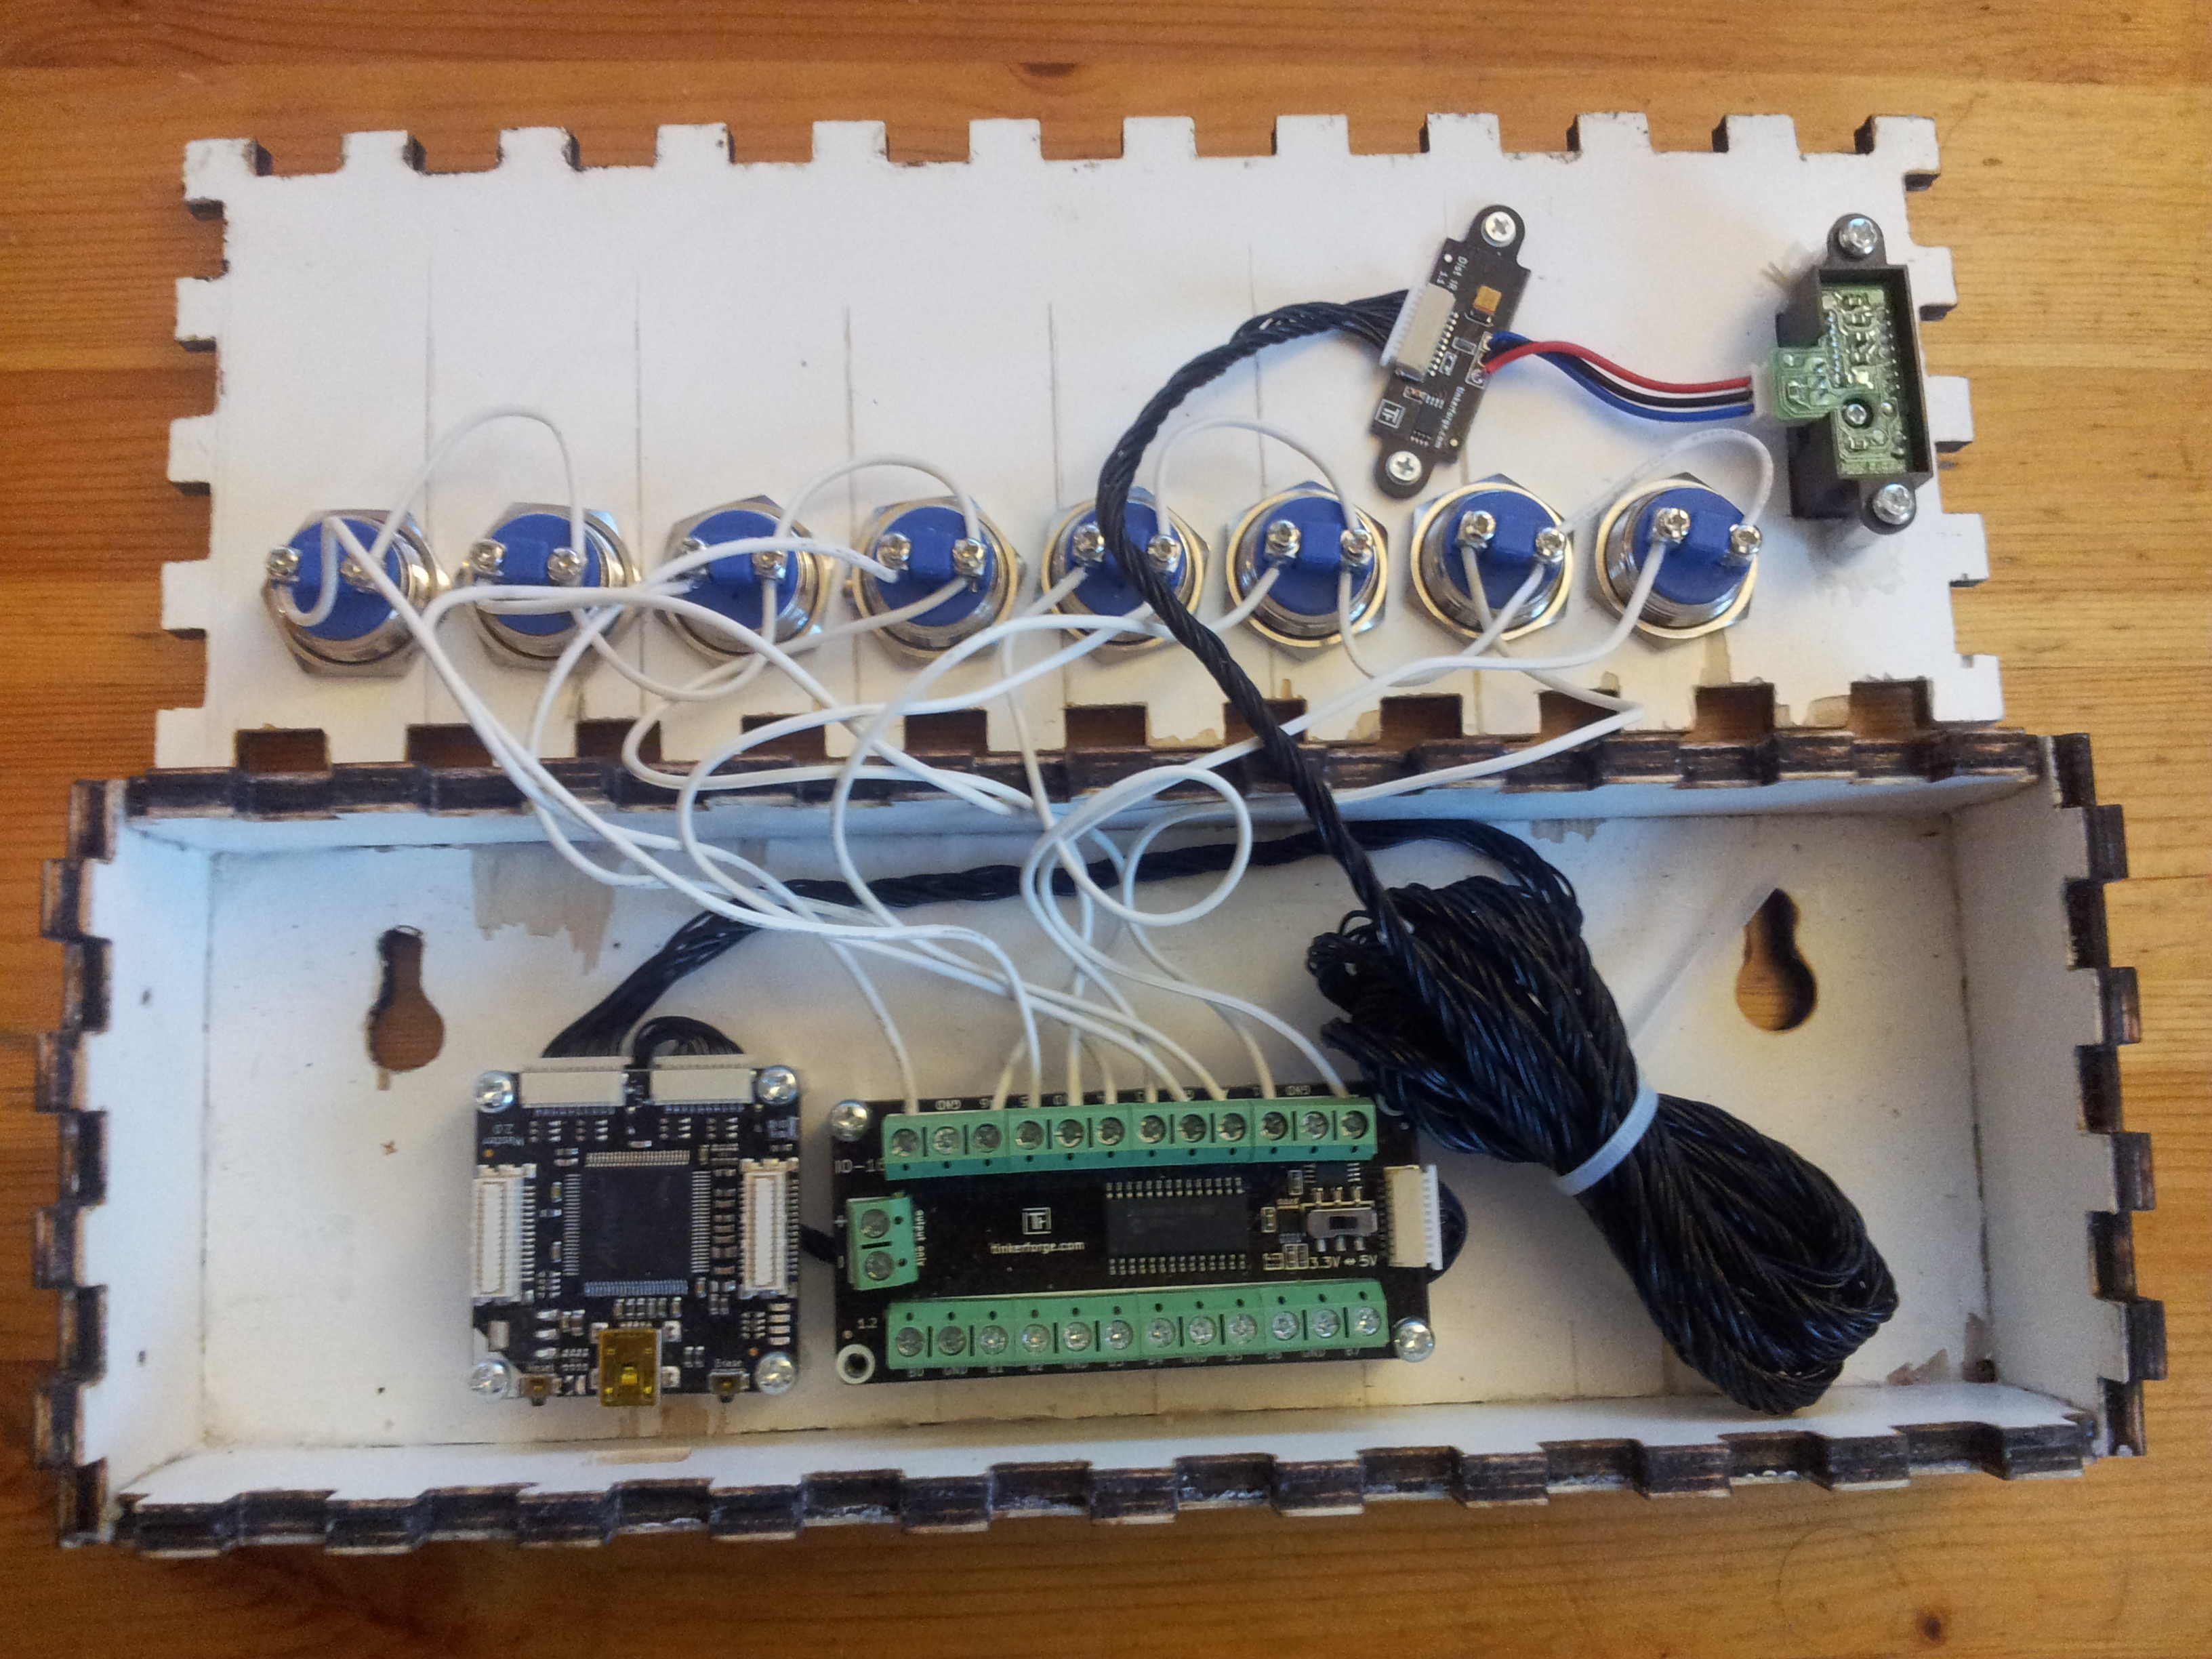
lightbox updated
|- raspberry pi B+
 |- masterbrick
  |A- dual relias bricklet (2x 230V relais)
  |B- dual relias bricklet (2x 230V relais)
  |C- dual relias bricklet (2x 230V relais)
  |D- dual relias bricklet (2x 230V relais)
 |- masterbrick
  |A- IO-16 bricklet
  |B- distance IR bricklet
 |- Ralink RT2571W (WLAN AP using hostapd)
    Bus 001 Device 004: ID 050d:705a Belkin Components F5D7050 Wireless G Adapter v3000 [Ralink RT2571W]
raspberry pi B+ hardware upgrade
the B+ is really worth every cent. i love that it has 4 USB ports now and that it won’t ‘reboot’ when unplugging a USB plug, which the raspberry pi B always did. while the raspberry pi B could be powered over the 2 USB ports (not using the mini USB port intented for powering it) this was not true for the B+. my new ‘hack’ is to connect the power to the R-PI GPIO pins and on the USB side at the same time. this seems to work (don’t know if it hurts the PI so - be careful). you can see this ‘fix’ in the pictures.
power usage
my measurements are not as accurate but give you an overview:
- ~2W = (230V to usb converter) + raspberry pi B+ + 2x tinkerforge master brick
- additionally: 0,4W per triggered relais, that is: 6 x 0,4 = 2,4W additional load (peak)
- additionally: 2,6W for the WLAN USB module
overall power consumption is between ~3,8W and ~5,4W (including the USB power supply), which isn’t bad!
wireless access point
i was following the guide at [7] and [8] to get the AP working:
my /etc/network/interfaces configuration:
auto lo
iface lo inet loopback

auto br0
iface br0 inet dhcp
        bridge_fd 1
        bridge_hello 3
        bridge_maxage 10
        bridge_stp off
        bridge_ports eth0 wlan0
allow-hotplug eth0
iface eth0 inet manual

allow-hotplug wlan0
iface wlan0 inet manual
my hostapd.conf configuration:
interface=wlan0
driver=nl80211
#ieee80211n=1
bridge=br0
country_code=NZ
ctrl_interface=wlan0
ctrl_interface_group=0
ssid=bar
hw_mode=g
channel=1
wpa=3
wpa_key_mgmt=WPA-PSK
wpa_passphrase=12345678
wpa_pairwise=TKIP
rsn_pairwise=CCMP

beacon_int=100
auth_algs=3
macaddr_acl=0
wmm_enabled=1
eap_reauth_period=360000000
eapol_version=1
logger_syslog=-1
logger_syslog_level=2
this works very well with android and my linux based laptop. someone had problems connecting to it using windows 7 though.
# lsusb
Bus 001 Device 004: ID 050d:705a Belkin Components F5D7050 Wireless G Adapter v3000 [Ralink RT2571W]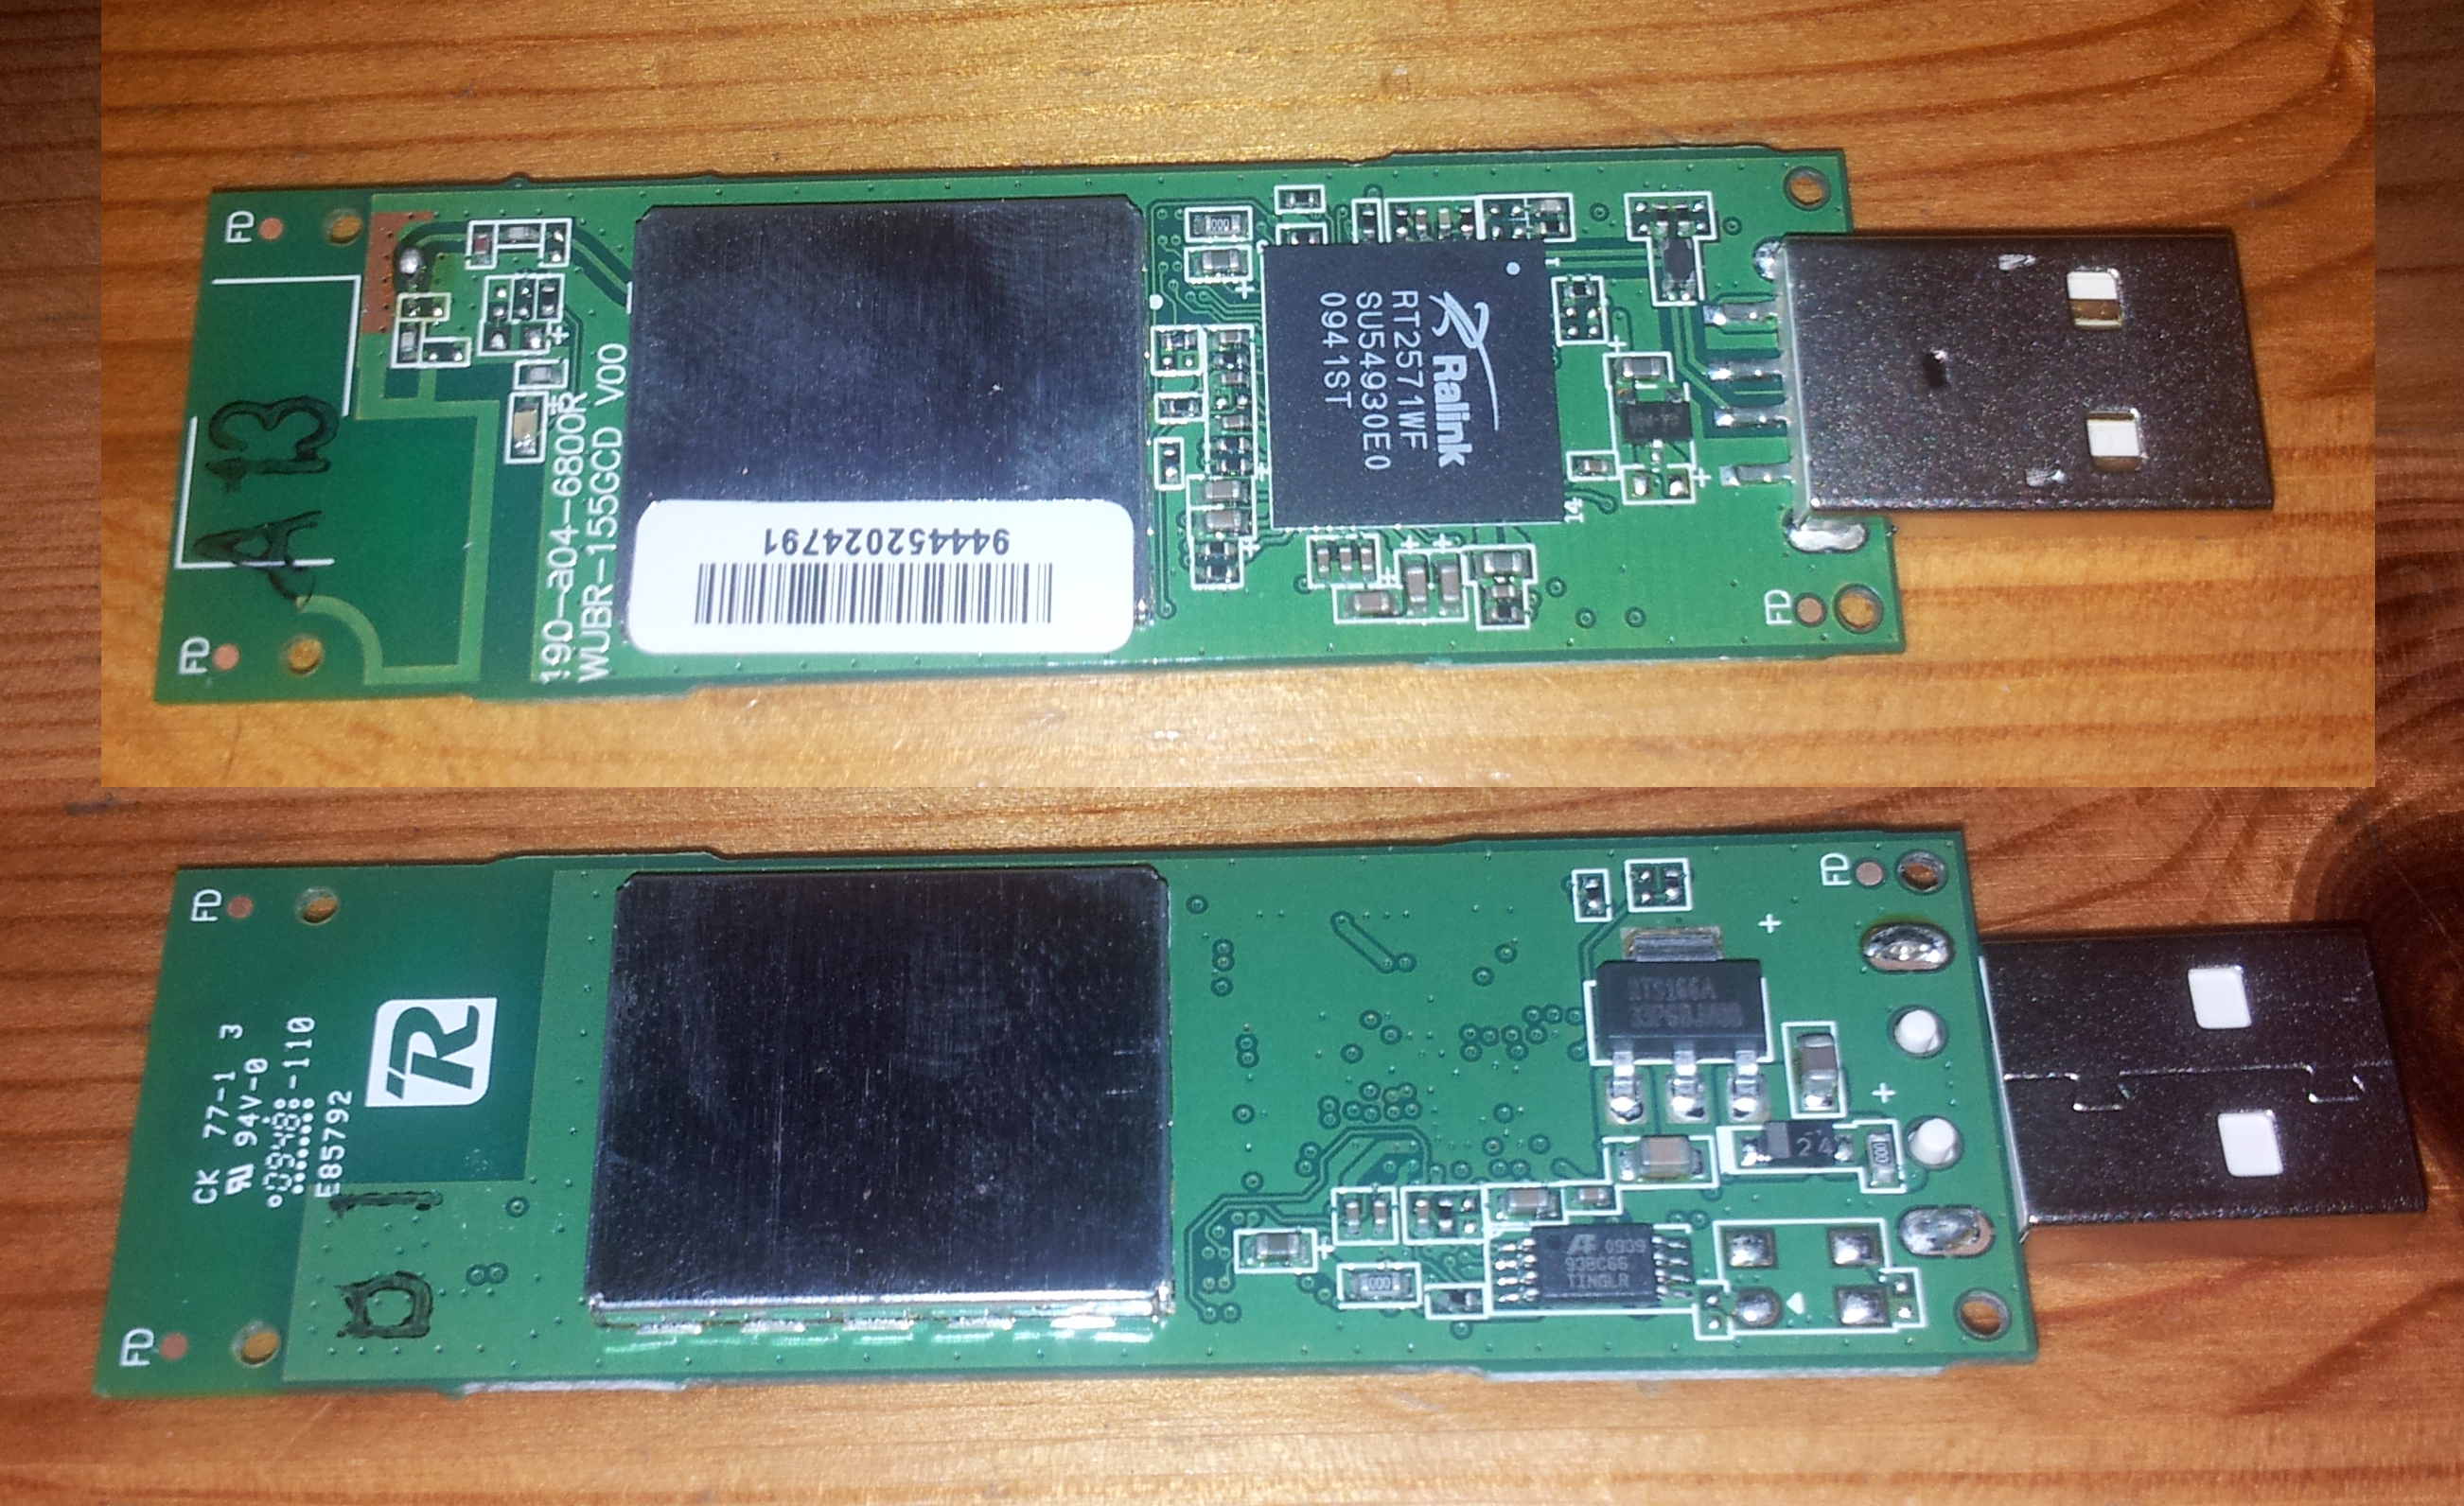
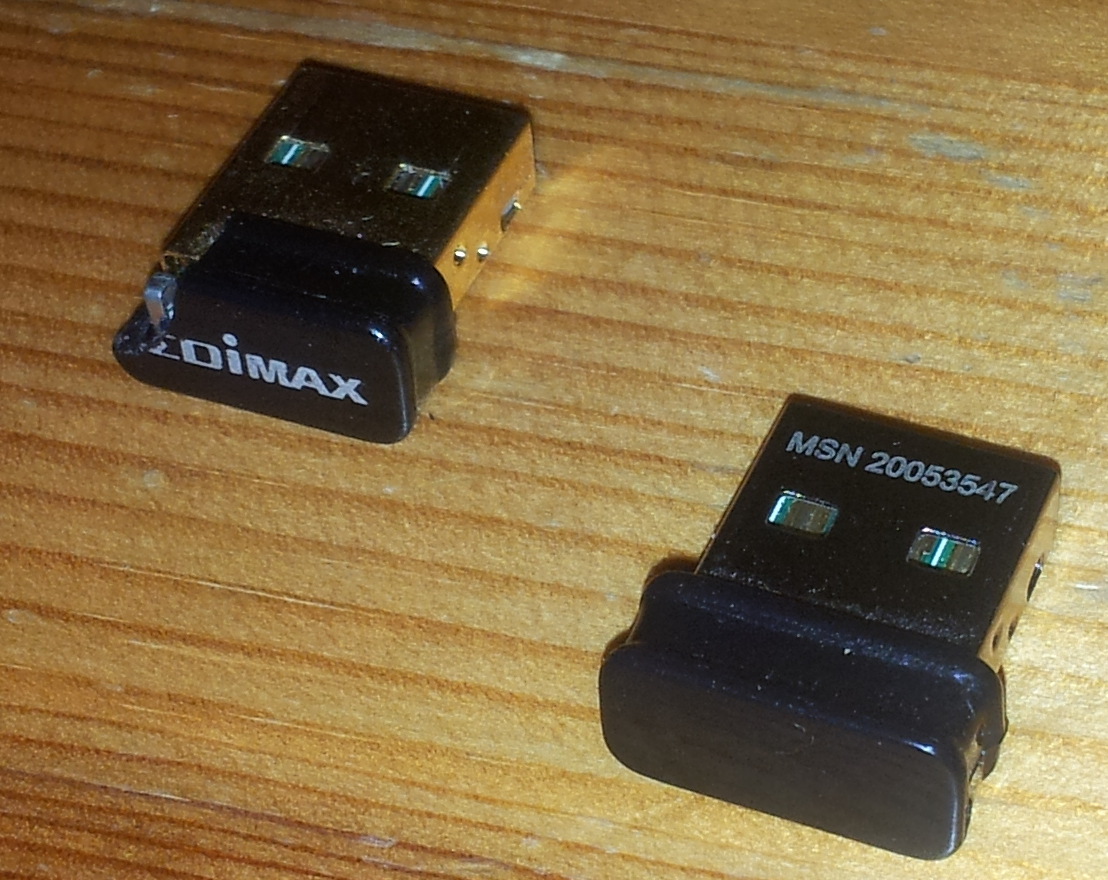
note: initially i tried two realtek based adapters, both worked to a certain degree but failed as access point, as my connection would drop the wpa_supplicant subscripted client, when watching youtube videos or similar things involving big data rates. others seem to have problems as well, see discussion at [2]. i tried to debug this for a while but the problem seems to be in the driver.
raspberry pi - RS232 Serial Interface
oh, and i bought a ‘PL2303HX USB to TTL to UART RS232 COM Cable module Converter’ [3] which is really helpful when debugging the boot process of the pi.
note: i initially had issues copying the SD card to the micro SD card using the linux tool dcfldd [4] (similar to ‘dd’) and the serial interface was showing the problem and i didn’t have to connect any HDMI cable.
i usually love to use picocom [5]:
picocom /dev/ttyUSB0 -b 115200 -lavahi
i also installed avahi on the pi, now i can just type:
http://rasbperrypi.local into the browser, no matter what IP was assigned to the pi.
note: the name could be changed by changing the hostname (/etc/hostname) on the raspberry pi, but i like it to be rasbperrypi.
note: this does not work with android, as they don’t ship avahi and i couldn’t find any convenient way of installing it on android. one workaround would be to integrate avahi into your router but i don’t have access to the DNS on that device so only my linux running computers benefit from it.
inkscape with box maker extension
the box was designed with the box maker extension [11] for inkscape.
conclusion
this hardware upgrade was really worth it. i was using a laser cutter at the shack space in stuttgart [9] which is really a nice place and it was interesting to work with this tool [10]. thanks to robert tagscherer for his help with everything!
usability increased in many regards!
links
- [1] http://www.tinkerforge.com/
- [2] http://www.linuxine.com/story/raspberry-pi-edimax-wlan-stick-drops-connection
- [3] http://www.savagehomeautomation.com/projects/raspberry-pi-rs232-serial-interface-options-revisit.html
- [4] http://dcfldd.sourceforge.net/
- [5] https://code.google.com/p/picocom/
- [6] https://en.wikipedia.org/wiki/Avahi_(software)
- [7] http://www.raspberrypi.org/forums/viewtopic.php?f=36&t=8861
- [8] http://blog.skufel.net/2014/11/ho-to-use-raspberry-pi-as-wireless-access-point/
- [9] http://shackspace.de/
- [10] http://shackspace.de/wiki/doku.php?id=lasercutter
- [11] http://hackaday.com/2012/07/26/box-maker-extension-for-inkscape/