tinkerforge relais raspberry pi
23 feb 2014
![]()
motivation
i love ambient illumination so i installed about 10 different LED systems into my room. the downside is that controlling that many devices manually, which also includes two TFT monitors and my stereo. this post documents the various software designs i tried until i ended up with a node.js installation on a raspberry pi (PI for short) which is no used several times a day to control my devices’ power states.
WARNING - DISCLAIMER:
i’m no expert in electrical engineering - so if you copy this work, ask an expert to check on your setup before making daily use. especially check these things: ***
- i’m no tinkerforge expert, check your facts!
- do not work with 230V unless you really know what you are doing, it can kill
- ensure that the electrical load you are working with does not exceed given relais parameters
- add a filter so that a single relais isn’t toggled more than 10/min and disable the control on bursts
- consider adding a https://en.wikipedia.org/wiki/Residual-current_device
- this device is running in my LAN, do not expose it to the internet without further security additions
- consider running the node application as a normal user and not as root as i do
in fact, i’ve chosen tinkerforge dual relais bricklets over a self-built relais to avoid making critical errors which could result in your house burned to the ground or lives put to danger.
I’M NOT RESPONSIBLE IF YOUR DEVICE KILLS YOUR CAT OR BURNS DOWN YOUR HOUSE - YOU HAVE TO KNOW WHAT YOU ARE DOING!
prior to this self-made solution i was considering remote controlled electrical switches.
the problems i had with these were a mixture of:
reliability problems
i need to know if a trigger command really worked, if not i could have used the remote switch bricklet [14]
short lifespan
remote controlled electrical switches start to break after 1-2 years; a sign is that you have to trigger the ON-key several times or that you can’t force them OFF anymore…
too expensive
openHAB http://www.openhab.org/features-tech.html seems to be interesting but i think it is quite complex i wouldn’t know if that stuff works the way i want it to
horrible usability
no app support, if so these apps often rely on proprietary infrastructure
example: http://www.eq-3.de/produkt-detail-zentralen-und-gateways/items/homematic-zentrale-ccu-2.html
- have a look at the manual, the webpage of the device looks like made in the 80s and they don’t even the word ‘open source’ so assumably the interface can’t be modified and is proprietary
probably most vendors do not provide a REST interface
security issues because of:
- proprietary software or, even worse,
- a proprietary box you place into your NAT which constantly connects to a third party vendor to give you app support
- wireless with no encryption or proprietary encryption
because of this built my own device for controlling 6x 230V using my PC, phone, tablet or a 3x4 key pad. as a nice side-effect this also gave me the opportunity to play with different programming languages/web development tools.
here is my setup:

the setup consists of:
raspberry pi (model b)
tinkerforge
- master brick - http://www.tinkerforge.com/de/doc/Hardware/Bricks/Master_Brick.html#master-brick
- 3x dual relais bricklet - http://www.tinkerforge.com/de/doc/Hardware/Bricklets/Dual_Relay.html#dual-relay-bricklet
- 1x multi touch bricklet - http://www.tinkerforge.com/de/doc/Hardware/Bricklets/Multi_Touch.html#multi-touch-bricklet
- 1x 3x4 key pad - https://www.tinkerforge.com/en/shop/accessories/sensors/key-pad-3x4.html
hardware setup
the following 3 images show my prototype which, at that time, did not include the multi touch bricklet but instead a 4th dual relais.


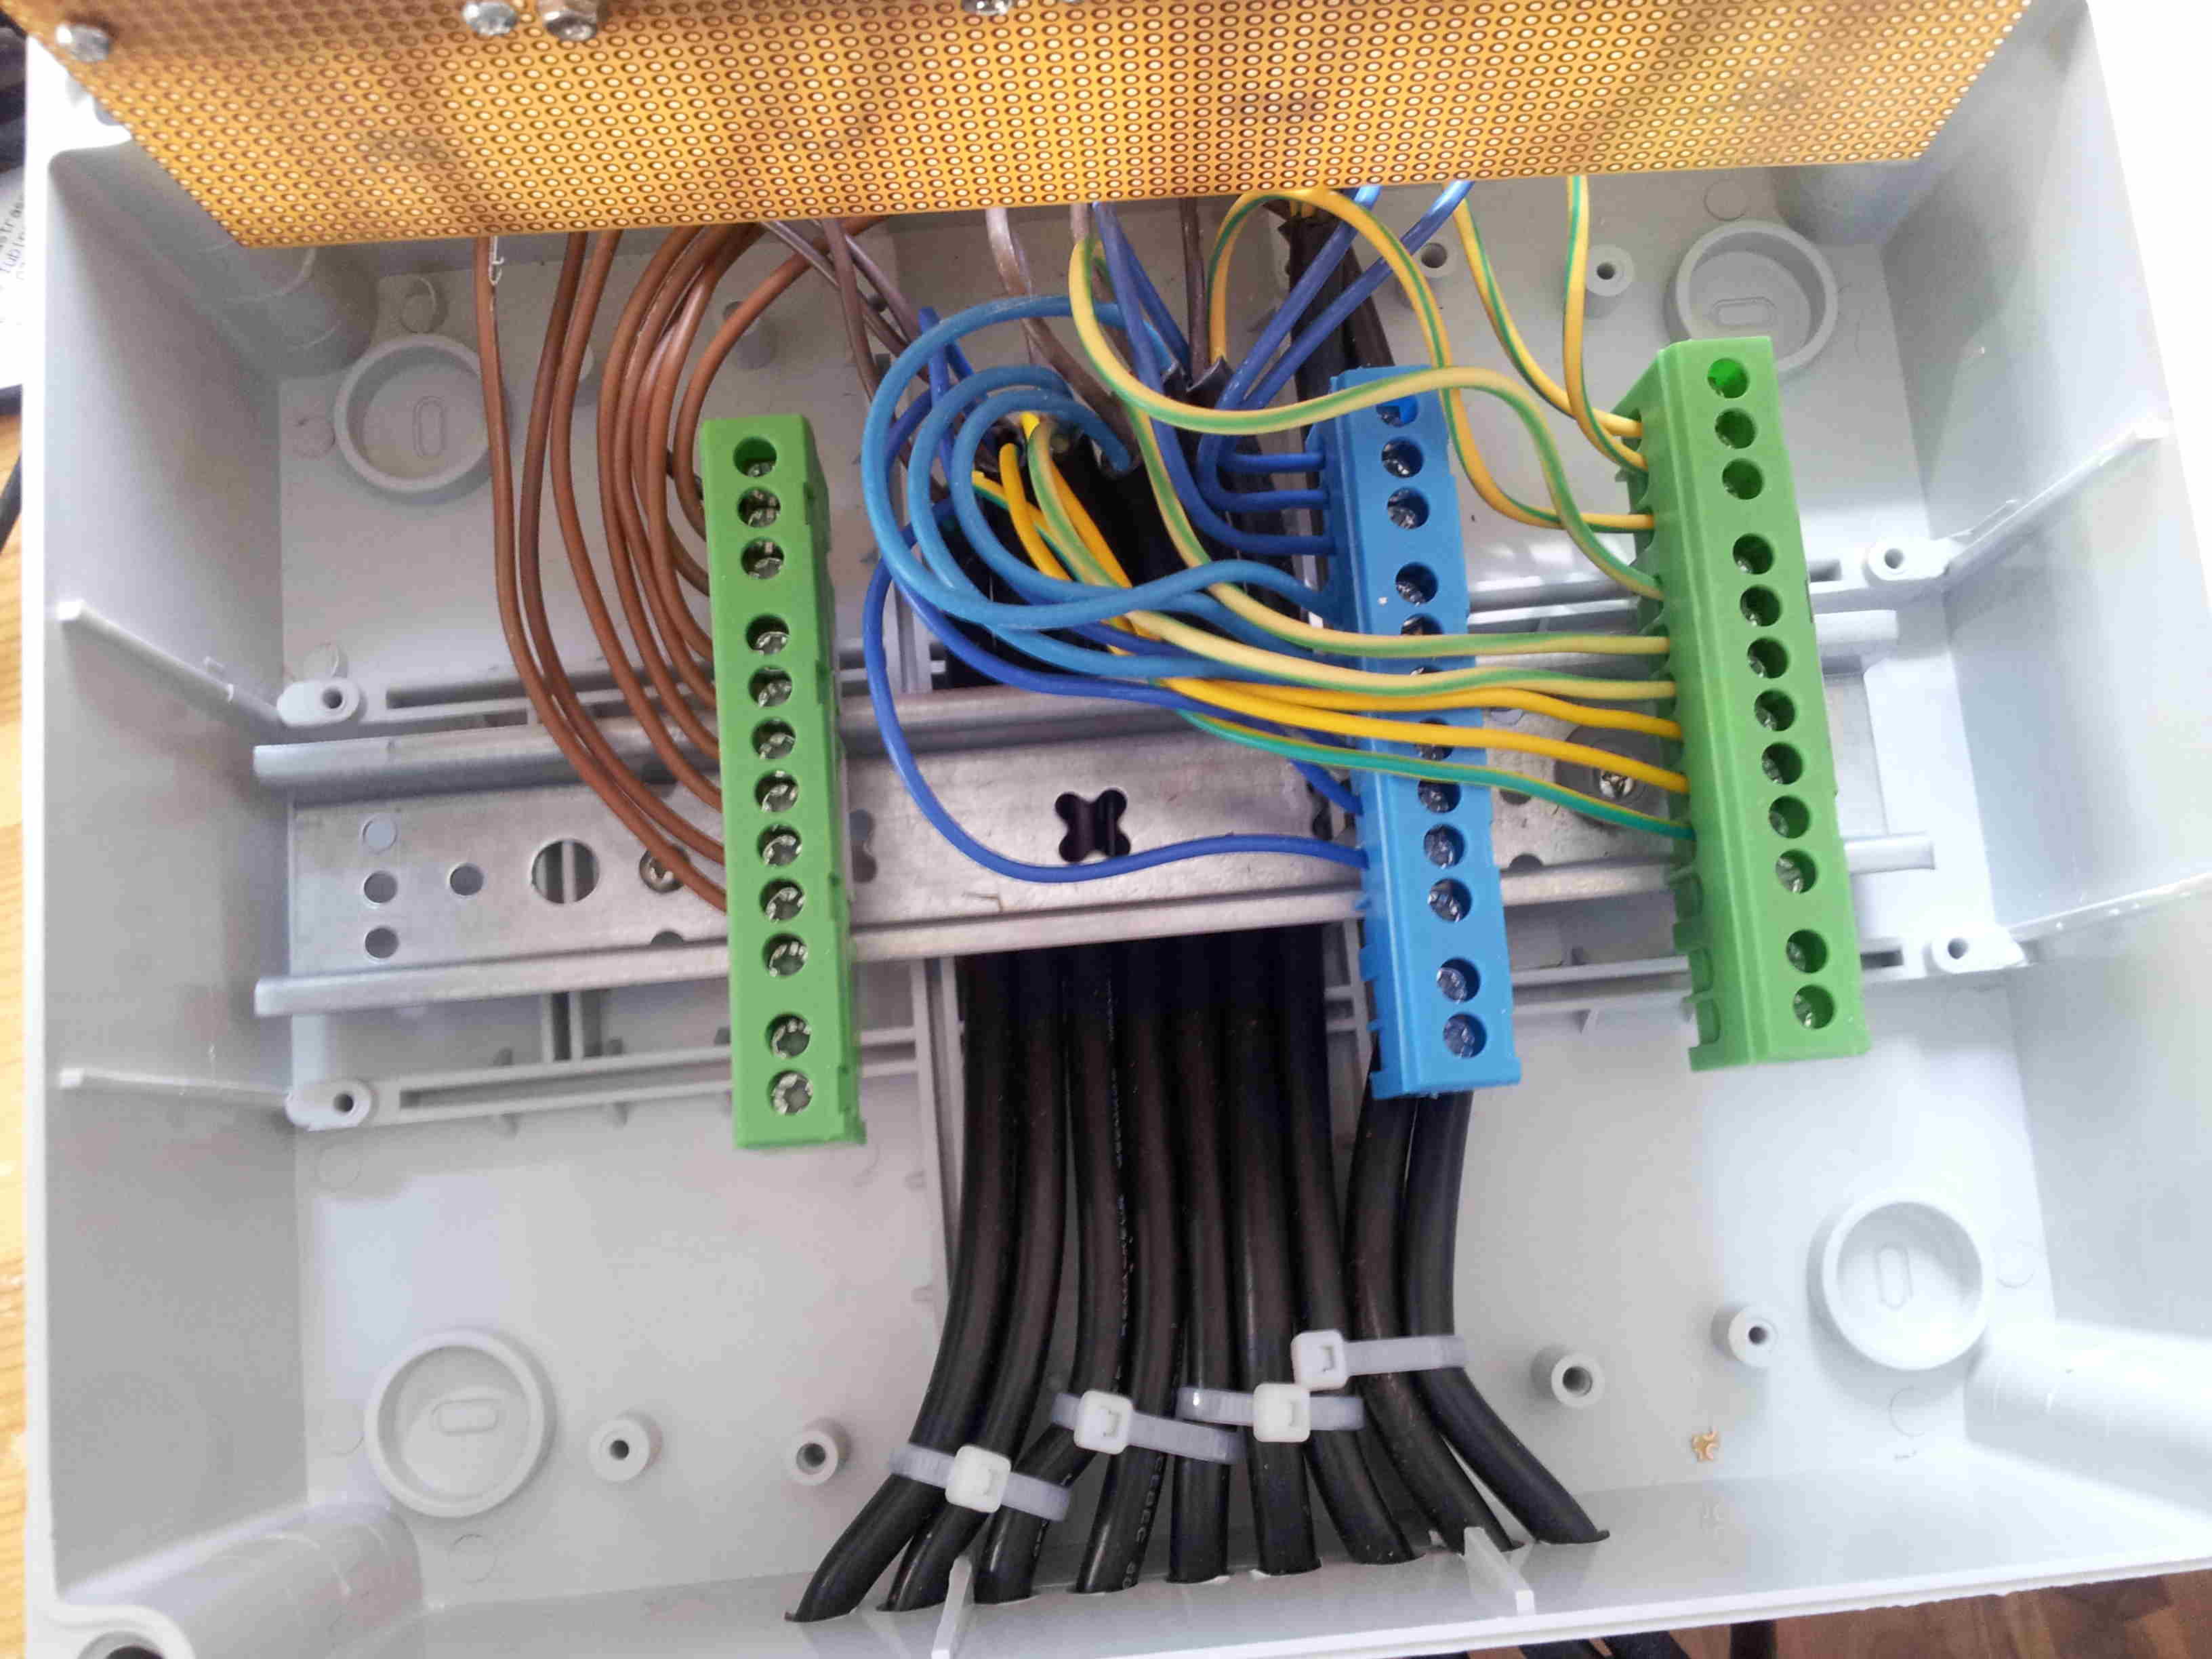
the evolution of my tinkerforge hardware stack
my first setup using tinkerforge [1] hardware and controlled it from my laptop using USB:
|- masterbrick
|A- dual relias bricklet (2 230V relais)
|B- dual relias bricklet (2 230V relais)
|C- dual relias bricklet (2 230V relais)
the first impression of tinkerforge’s hardware and software were promising. i integrated the tinkerforge components into a breaker box but i didn’t add any fuses. tinkerforge relies on a computer taking control of the stack every time you want the state to change and if you unplug the usb cable all relais are set to their initial position, which is OFF.
adding WIFI
since i wanted to control the stack from my mobile phone and tablet (as well as from my laptop) i bought the, back then, brand new WIFI extension [2]. i would have bought the ethernet extension [3] if it had existed back then. the configuration was pretty easy, but that connection wasn’t too great because of the bad WIFI signal and maybe some problems between the wifi extension and the d-link router. anyway i was able to control the stack most of the time without having to reset my tinkerforge stack by power cycling the stack.
|- masterbrick
|   |- WIFI Extension
|A- dual relias bricklet (2 230V relais)
|B- dual relias bricklet (2 230V relais)
|C- dual relias bricklet (2 230V relais)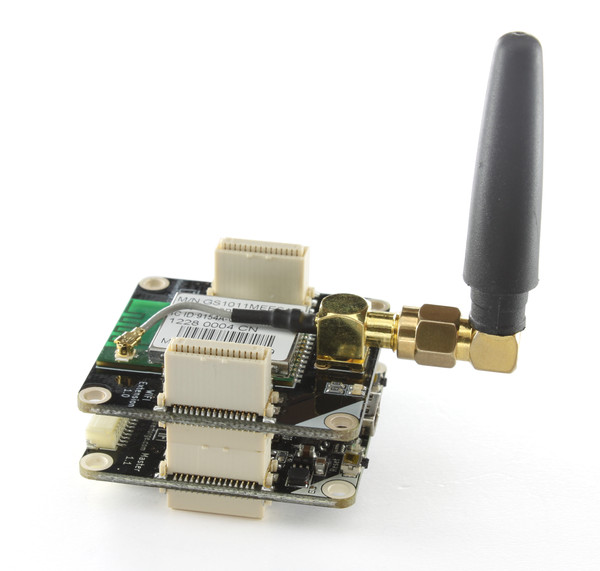
i was using the WIFI extension for weeks but it turned out that my reception wasn’t very good and had a lot connection issues (probably caused by bad SNR with additional D-Link quirks).
adding a raspberry pi and a multi touch bricklet
so i came up with a new solution: i added a raspberry pi to the stack:
|- raspberry pi
 |- masterbrick
  |A- dual relias bricklet (2 230V relais)
  |B- dual relias bricklet (2 230V relais)
  |C- dual relias bricklet (2 230V relais)
  |D- multi touch bricklet
   |- 3x4 key pad
at tinkerforge they are currently designing the ‘red brick’ http://www.tinkerforge.com/en/blog/2014/2/21/tinkerforge-goes-stand-alone-aka-red-brick. i’m really looking forward to having one!
power usage
- 1,8W = (230V to usb converter) + raspberry pi + tinkerforge master brick
- additionally: 0,4W per triggered relais, that is: 6 x 0,4 = 2,4W additional load (peak)
tinkerforge ‘master brick’ and ‘WLAN extension’ weren’t measureable so the 1,8W are caused soly by the raspberry pi ;-)
software
requirements:
usability optimized for touch screens (big buttons/adaptive layout)
interface which can be controlled via curl (or similar) - REST
- global shortcuts, see
every attached browser instance must reflect the state (without having to do manual page reloads), see [6]/[7]
must be running reasonable fast:
- time from off to ready must be reasonable fast
- fast response times (app must feel interactive)

i experimented with different languages:
- native android app, running on my nexus7 tablet
- ruby with ruby on rails (running on the raspberry
pi)
- i deplyed a hello world example with model/view/controller to my PI and started it in debug mode - it was simply too slow so i skipped ruby
- scala using the lift framework
- javascript with the very fast node.js framework
native android app
my initial design was to use the master brick with the WIFI master extension. i designed a native android application (java) using the android SDK [8]. it took me one day to write a basic client application for the nexus 7 and i would like to point out that the android SDK has a remarkable documentation and workflow.
native android application drawbacks:
- i had to put all the intelligence into the client application
- the socket to control the brick stack was without security protection, everyone in my LAN with brickv running could control the stack ;P and there would never be a way around that, except creating a second wireless LAN.
- if i was using my samsung galaxy s2 and nexus 7 in parallel it would not reflect the real state of the hardware as brickd does not implement MVC. i would have had to implement polling but i did not like that idea
- back then my WIFI was unstable so i often had to wait a long time for the initial connect or reset the tinkerforge stack manually
client/server implementation (HTTP) advantages:
- client perspective: everyone with a smart phone/tablet/laptop can now control the device
- server perspective: using the raspberry pi (a linux computer) grants additional flexibility
OS deployment on the raspberry pi
some remarks about the installation:
- i’m using 2013-02-09-wheezy-raspbian.zip [3]
after the first boot, i had a keyboard/screen attached and configured these values:
- enabled sshd
- disabled X
- changed the password of the ‘pi’ user
using scala/lift and jetty
i had been playing with ruby on rails so far but, after i’ve been talking to stefan schlott [3] about my project, i changed my mind and continued using [4] scala/lift.
Lift code is as clean and brief as Rails, yet performs at least 6 times faster and is multithreaded. Additionally, because Scala is strongly typed, the compiler catches type errors.
lift implements ajax and comet [9]/[10] and [11] to make the DOM-tree dynamically changable (without having to implement page reloads) - i love this!
i was using IntelliJ [12] for doing most scala/lift development, this is really a great IDE!
in regards to deployment i found it encouraging that there are several ppl using jetty on the raspberry pi already and that there is a collection of high quality examples about what can be done with lift, see [5] and [6].
additional software:
apt-get install vim htop screen jetty8 openjdk-7-jdkafter that i create a war package:
./sbt
package-war
various jetty optimizations:
JAVA_OPTIONS="-Xmx256m -Drun.mode=production -noverify" # 3 seconds
#JAVA_OPTIONS="-Xmx256m -Djava.awt.headless=true -noverify -Drun.mode=production" # 3 seconds


# Home of Java installation.
JAVA_HOME="/usr/lib/jvm/java-7-openjdk-armhf/"
after i applied the optimization i tested the chat app again:
lift performance on raspberry pi without optimization using firebug
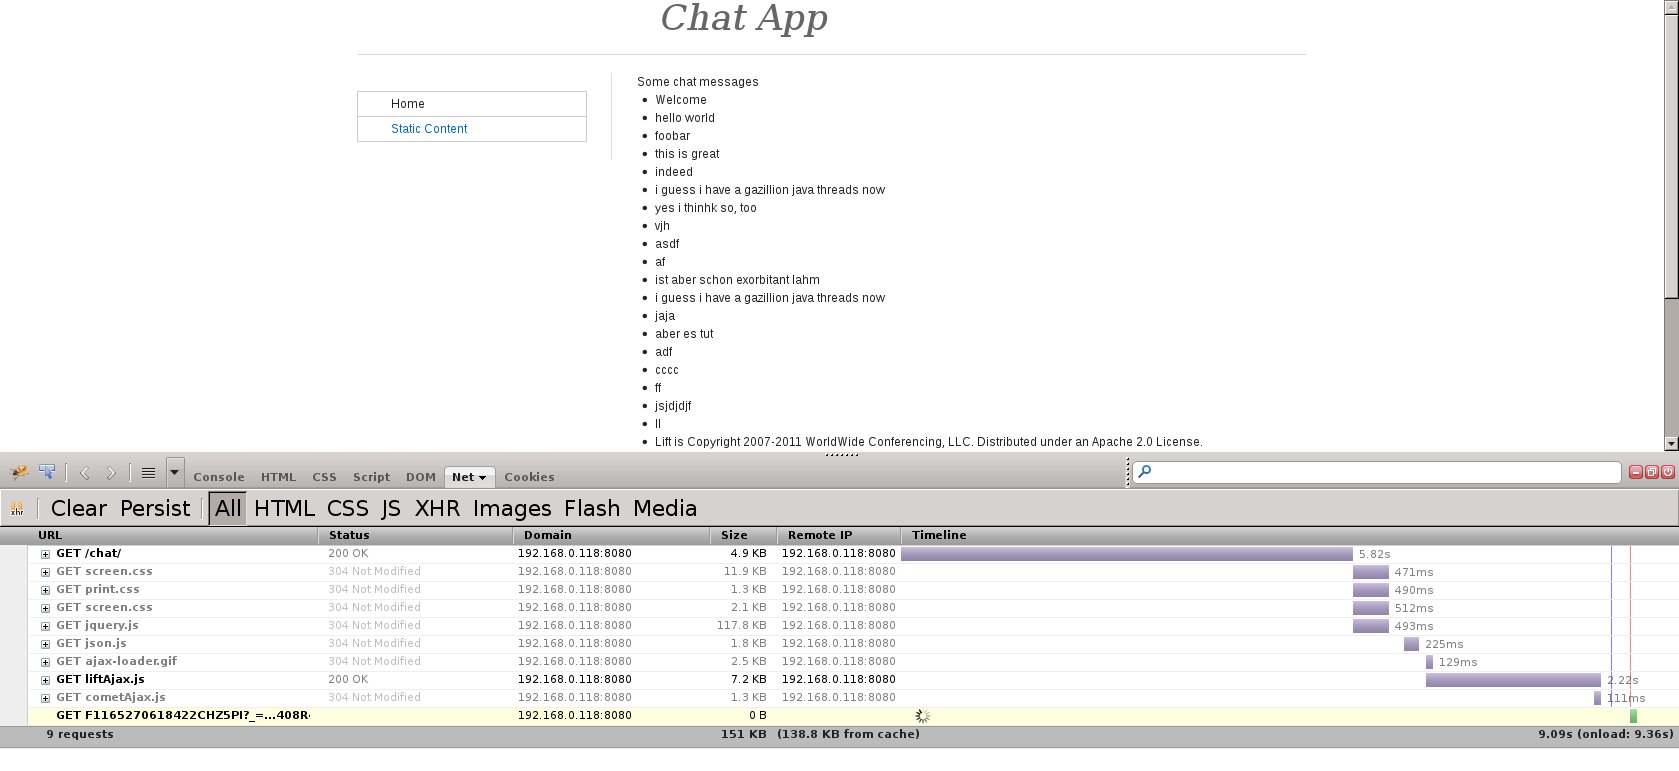
the comet roundtrip time was from hitting return on the client and seeing the view updates on the client is about 2250 ms.
lift performance on raspberry pi after optimization using firebug

the comet roundtrip time was from hitting return on the client and seeing the view updates on the client is about 273 ms.
in both cases this means 100% PI CPU usage for the shown time.
scala/lift summary:
restarting jetty took about 1-3 minutes after heavy optimizations, which i can’t remember right now. clicking button using comet took about 1 second of 100% cpu load on the PI until the other clients were updated. however, i was using openjdk which is AFAIK not optimized for ARM and also lacks JIT (runtime optimization). about 2-4 months after i started using scala oracle released embedded java (or similar) but i didn’t try it
i don’t like the fact that i need to edit/build the application on a different system than the PI since the java IDEs like IntelliJ or eclipse are very demanding
i didn’t find out how to make the comet (or java) faster and wonder why [13] seems to be so fast
scala with lift seems to be a very cool framework and probably got potential
lift comets are implemented using ‘long polling’ [13] and are not based on websockets yet:
the manual says:
Lift’s current Comet implementation uses long polling. In the future, Lift will also use WebSockets, but the WebSocket API and implementation isn’t “baked” yet, and Lift’s current implementation works well for browsers from IE6 on. Lift’s long polling implementation opens a single HTTP connection from the browser to the server if one or more Comet components are detected on a HTML page. The request contains a list of the components and the “version” for each of the components. If the version number of any of the components on the server is “newer” than the version on the client, the deltas are sent as the response, the connect is closed, the browser applies the deltas and then re-opens the HTTP connection (with HTTP 1.1 keep-alive this does not imply reopening a TCP/IP connection.) If the version of the component changes while the HTTP “poll” is open, the deltas are sent down as a response and the connection is closed. If no state changes after 110 seconds (this is a tunable parameter), a noop is sent to the browser and the browser re-opens the HTTP connection. The 110 second timeout is to insure that Lift’s comet implementation is proxy friendly.
i like socket.io for node.js which implements websockets where possible and uses long polling as fallback already.
using javascript/node.js
compiling node on the PI took about 30-70 minutes IIRC. the first ‘hello world’ applications were easy to understand and were very fast.
the source for this project can be found here:
https://github.com/qknight/relais.js/blob/master/relais.js/
MVC missunderstandings
my first problem was that i didn’t understand MVC in node.js. i was trying ember.js to get realtime sync in the views without realizing that most of these frameworks are, despite what MVC might imply, not doing that. most of them require a F5 refresh to sync the views but i wanted sync in realtime. since i was new to node programming i didn’t understand how to keep track of all websocket contexts at first but after reading the excellent code from Olli K [5] it dawned on me.
at the time of this writing i was still using websockets directly, like done in example [5], instead of using socket.io. but i’d like to adapt to socket.io.
see: http://vuejs.org/perf/ Performance Comparisons
external programs to talk to the tinkerforge stack
since there are no node.js bindings for the tinkerforge
library (update 24.2.2014 14:14: see http://www.tinkerunity.org/forum/index.php/topic,2216.0.html).
anyway, i’m still using using c-programs to access the tinkerforge
stack:
relais-tool - https://github.com/qknight/relais.js/tree/master/relais-tool
is queried and returns a JSON formaitted answer which is processed
keypad-tool - https://github.com/qknight/relais.js/tree/master/keypad-tool
reports 3x4 key pad changes via JSON formatted to server.js
the integration is actually pretty simple and it is using stdin parsing with JSON messaging!
using the RESTful interface from the shell
since i want to use curl based scripts to access the relais, here is a bash shell script for triggering relais:
cat .trigger_relais
#!/bin/sh
relais=$1
cred="admin:admin"
ip="192.168.0.48"

state=$(curl --user "$cred" http://${ip}/state/${1})
nstate="0"

if [ "$state" == "0" ]; then
  nstate=1
else
  nstate=0
fi

echo $nstate

curl --user "$cred" -i -X PUT -H 'Content-Type: application/json' -d '{"value": "'$nstate'"}' http://${ip}/state/$1
with this command line:
./.trigger_relais 1starting relais.js on boot:
to start the node application after each boot i do:
edit your crontab using ‘crontab -e’:
@reboot /root/relais.js/starter.shnote: if the process crashes (or it receives a exception) it won’t be restarted automatically. if that gets a problem i’ll add a while true; do …; done loop into starter.sh
summary:
- i love the async nature of node.js
- using websockets directly is really easy. however, then you’ll need webkit on all android devices since the preinstalled webbrowser does not know about websockets
- talking to external programs using spawn in node.js is very easy and using JSON for comunication is very easy
conclusion
usability: using my device is so cool as all interfaces are very responsive and work reliably, better than anything i had been using before.
tinkerforge development is impressive. back when i started using it there was no WIFI extension, no multi touch bricklet and when writing this article i saw the exciting ‘red brick’ blog announcement - which could get a nice raspberry pi replacment if it runs using linux of course! i’m now using this hardware every day, for at least on year now, and so far it is rock solid.
node.js is a powerful framework and is very fast on the PI. i can’t stress this fact enough - really, try it!
things which would be cool to have:
- a bluetooth bricklet based on http://www.golem.de/news/tdk-winziges-bluetooth-modul-fuer-low-energy-geraete-1402-104545.html with strong encryption on top of the protocol
- relais.js needs cookie support and it should use HTTPS instead instead of HTTP
- for better deployment i should consider using NixOS on the PI by porting all this stuff to it, see: https://nixos.org/wiki/Raspberry_Pi
- voice input (with open source and without having to use SaaS) see: http://jasperproject.github.io/documentation/usage/
if you want to give me feedback, please mail to: js@lastlog.de
see also: https://news.ycombinator.com/item?id=7384549
copyright notice
images were taken (and remixed by me) from:
- wikipedia - https://www.wikipedia.org/
- tinkerforge.com - http://tinkerforge.com
- oxygen icons - http://www.oxygen-icons.org/
- raspberry pi - http://www.raspberrypi.org/faqs
links
- [1] http://www.tinkerforge.com/
- [2] http://www.tinkerforge.com/de/doc/Hardware/Master_Extensions/WIFI_Extension.html
- [3] http://www.tinkerforge.com/de/doc/Hardware/Master_Extensions/Ethernet_Extension.html
- [4] http://developer.android.com/sdk/index.html
- [5] https://github.com/gildean/raspi-ledblinker
- [6] http://www.raspberrypi.org/downloads
- [7] http://demo.liftweb.net/chat
- [8] https://github.com/lift/examples
- [9] http://en.wikipedia.org/wiki/Comet_(programming)
- [10] http://lifeofaprogrammergeek.blogspot.de/2010/06/deploying-war-in-jetty.html
- [11] https://fmpwizard.telegr.am/blog/lift-running-on-raspberrypi
- [12] https://www.assembla.com/spaces/liftweb/wiki/Using_IntelliJ_IDEA_to_develop_Lift_applications
- [13] http://lift.la/lift-and-data-driven-comet
- [14] http://www.tinkerforge.com/de/doc/Hardware/Bricklets/Remote_Switch.html#remote-switch-bricklet